
Learning to create a 3D image on a 2D surface was interesting with an attention to the pressure of the medium to create tone, and the awareness of the contour lines of the object. It was the use of charcoal that really brought this task into focus.
Up until now I had shy’ed away from charcoal on the basis that I’d admitted to myself that I just couldn’t work with it. I struggled to make it do what I wanted with less than satisfactory results, lacking to control any sharpness or definition and generally making a mess.

Attempt with charcoal
This is as far as I got before giving up in frustration. Using only the charcoal and my fingers I struggled to define any convincible depth, contour or detail. This is when I sat down to think about what was lacking, a middle tone, a highlight and a sharp edge, plus a plaster for the blister on my thumb from rubbing!
I think it was the blister that made me think of another way to approach charcoal. I decided to try a blending stick and found that I could create a uniform area of light grey and from there, depending on the pressure of the charcoal I could start to layer up some convincing tones. There was still something missing though and it was only after I started to use an eraser to get a sharp edge on the lines that I could work in the highlights and take control of the contrast.
This helped me move more confidently through the drawing as I knew I could build up layers by adding dark tones, erasing, adding and erasing again and again to get the desired shadows.
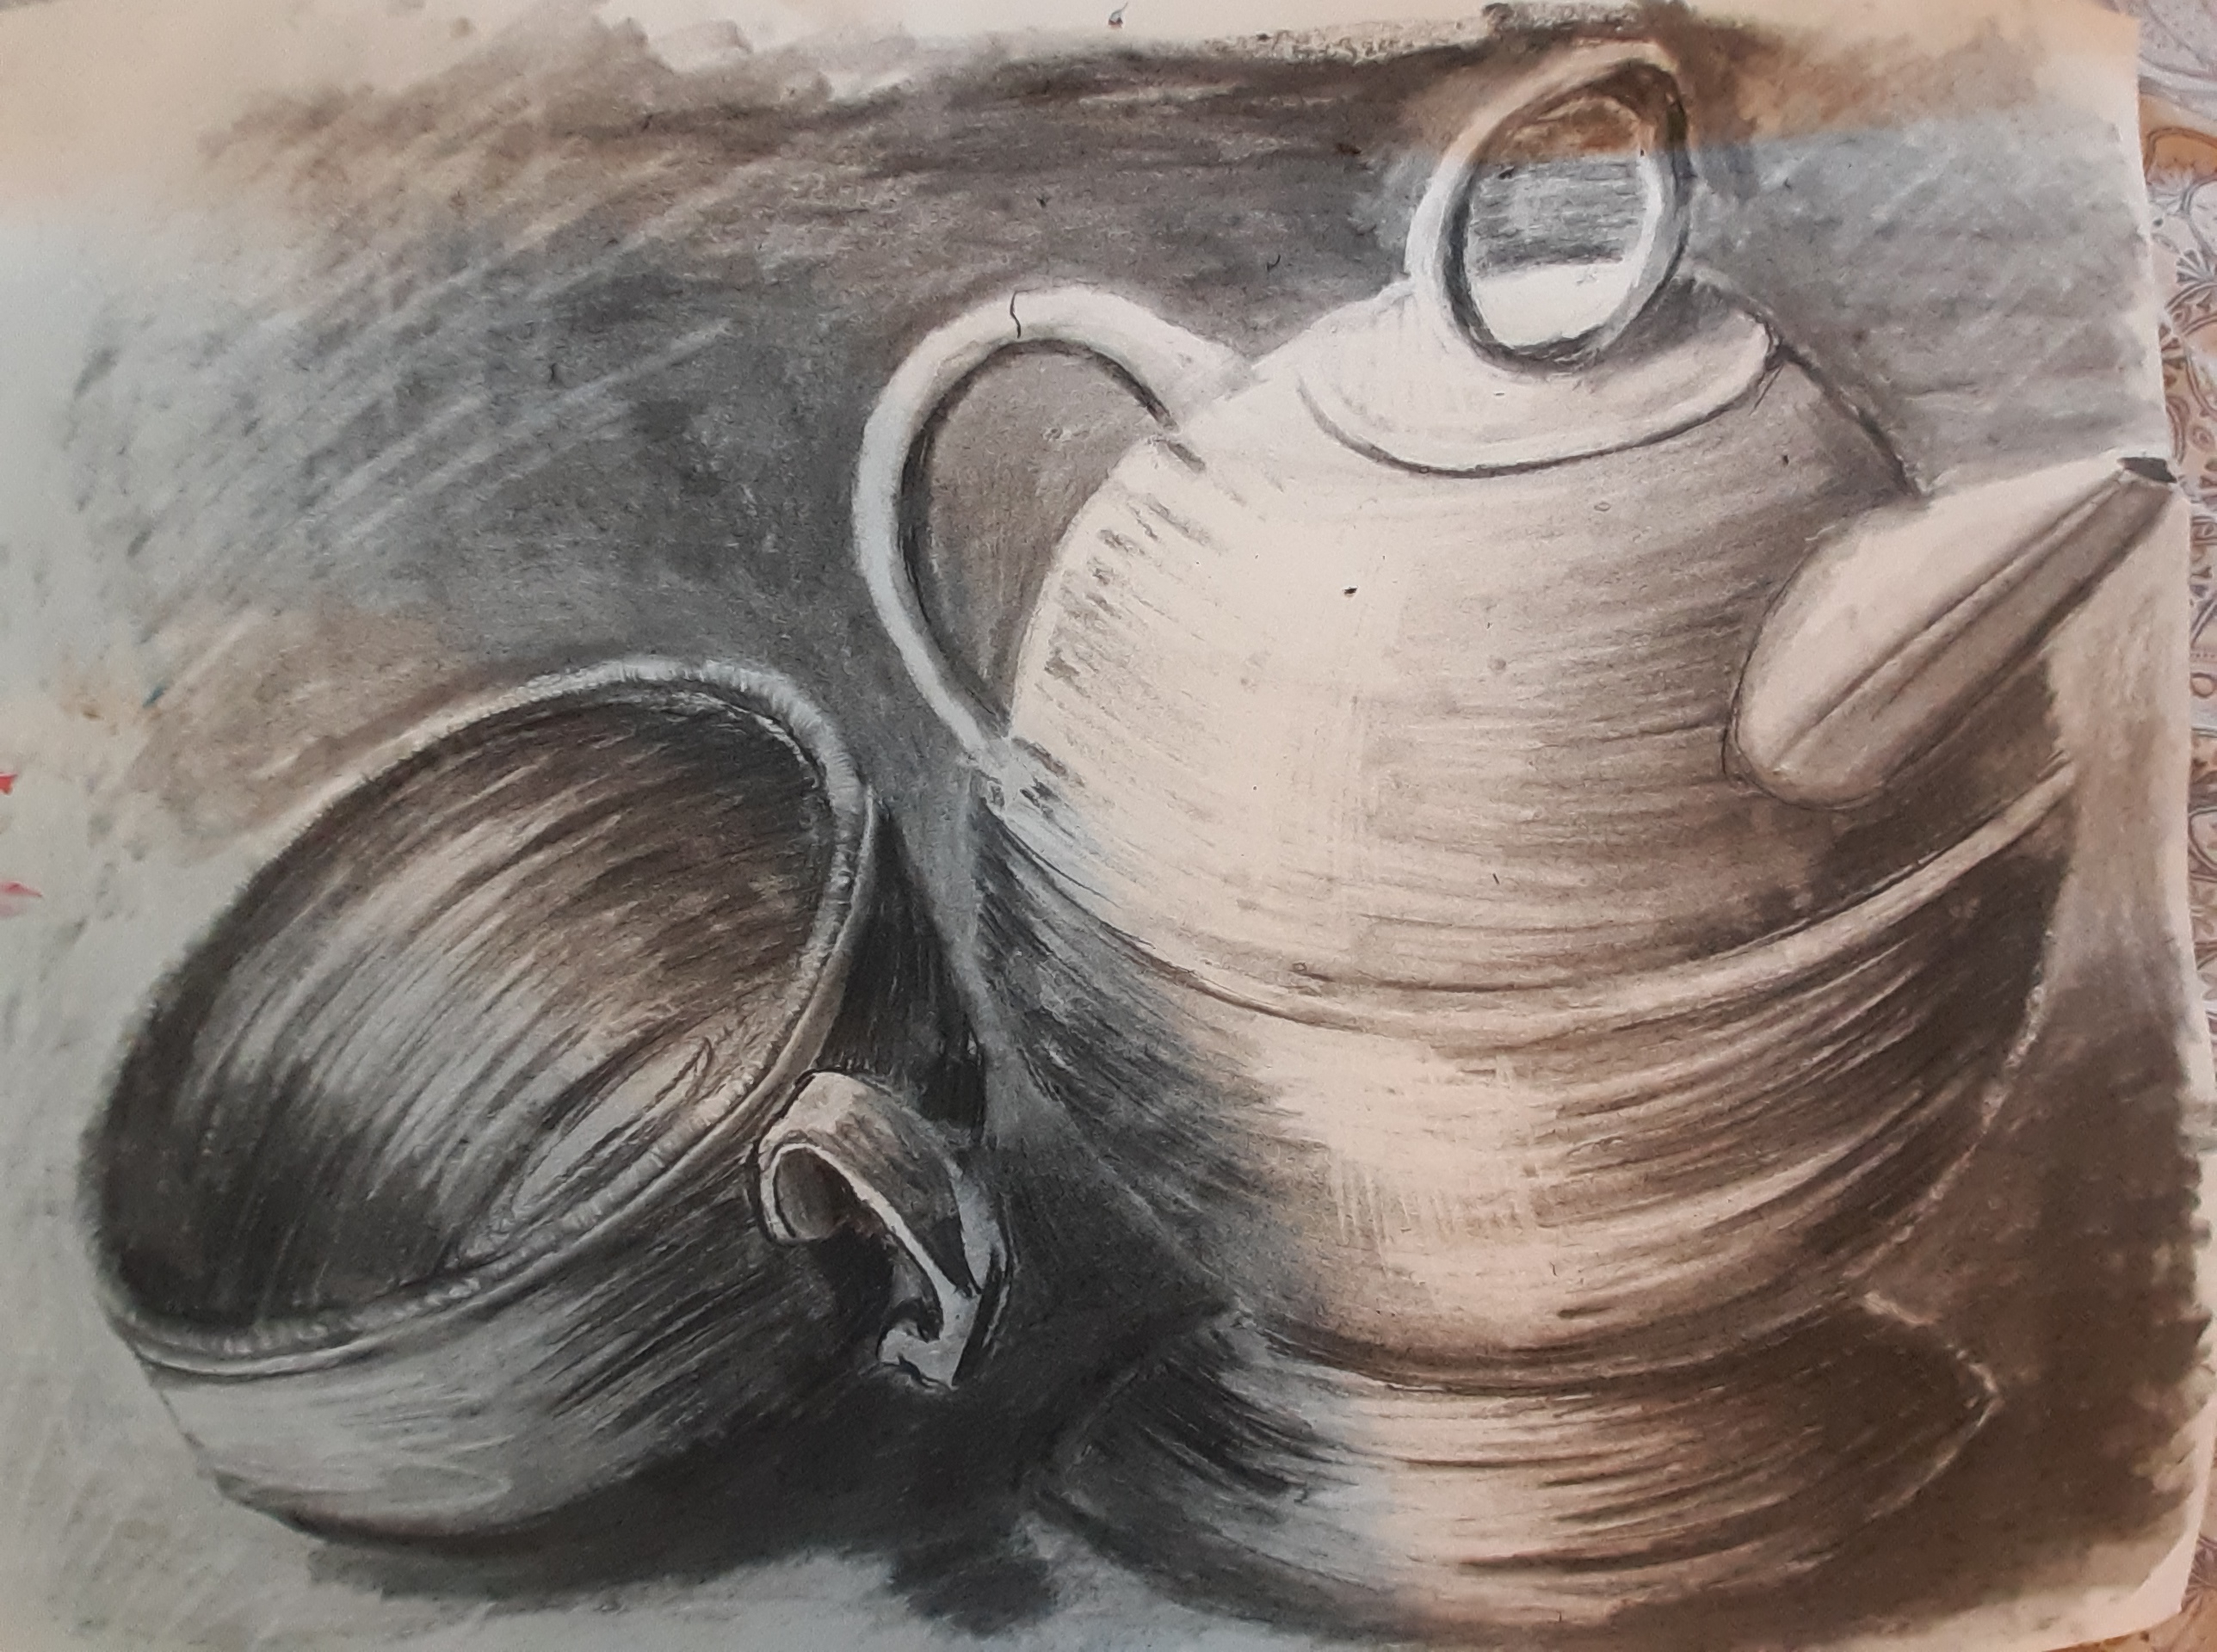
For me this was a satisfying achievement, not only overcoming my fear of charcoal, but also a technique I could see coming in useful with other mediums. It gave me much more control over layering up tones and by using the eraser with fast swipes I could describe the contours of the objects much better. I feel this has opened me up to many more ways to use a range of mediums with this technique and am looking forward to exploring it further.
