
This was a great exercise to explore how different mediums could be incorporated and how they would react, enhance, or cancel each other out. I started with a list of materials that came to mind so that I could experiment with them and make a short list of the ones that worked well together before I started to think of the subject matter or the composition.

With the abundance of materials to hand I tried to be mindful about keeping it relatively simple and not piling up too many different kinds of media, otherwise the overall picture would become too crowded and confused. Starting with two groups, ‘tools’ and ‘media’ I went about listing the different mediums I could think of, and likewise with the materials to draw onto. Water colour pencil, charcoal, coloured biro, paint pens, emulsion, PVA glue to mention a few, then I listed possible materials such as tissue paper, card, brown paper, newspaper, maps etc. I could then get a better idea of what textures I wanted to create and how I could go about it.
I tried out lots of variants of mixing the above lists to see what worked well together and what didn’t, and short listed 4 groups of media and materials to experiment on whilst building up a picture of what subject matter to use.
Fundamentally before I even started the experiment I wanted in this exercise to explore layers and surface textures which naturally drew me to things like newspaper, old maps, brown paper and other things I had lying around such as old sheet music and pamphlets. This drew me away from fabrics and rougher surfaces because I wanted to have a good control over detail, but I wanted to create layers of paper that absorbed the mediums in different ways, and also something that I could create contours or raised surfaces with to give interesting effects.

This idea leaned me towards simple bold objects and geometric shapes with the scope to allow for detail. Complex shapes like vegetables would have been too complicated so I was steered more towards bottles, glasses, fruit, cloth and the like, coupling the notion with newspaper and old sheet music I decided to try and put together a still life with a vintage feel to it so I looked about for some objects with simple shapes, option of detail and a variety of textures and this is what I came up with.
In my experiments I found that coloured ink, biro, paint pens, coloured pencil and emulsion paint all worked well together to give a range of aesthetics. Ink an emulsion, ink and newspaper all worked wonderfully and could be layered over with biro and pencil to give an agreeable harmony of shade and colour. The inks gave a vibrancy to the papers and the biro gave a stark contrast in tones, separating the background from the foreground. I enhanced this by thickly layering on the emulsion with a palette knife so I could control the contours or layer it on thinly so that the papers shone through. I could then build up the layers, putting darker papers underneath the shadowed areas adding to the depth of the picture.

By using these contrasting materials I was able to create a striking effect that literally stuck out from the page. One of the most surprising finds was using PVA glue over the ink which shone through, but if I shaded over the layer with biro the colour sat ontop of the glue and allowed the light to refract underneath giving it an almost glowing appearance as well as a natural shine to the surface. This I decided was perfect for a bottle.
So with vintage in mind I put together a still life with an Absinthe bottle, vintage port glass, a flat cap, an old bar jigger, a newspaper, some paintbrushes in a tin can and some citrus fruit. A nice range of differing textures and shapes, but all simple and allowing for a degree of detail. And being vintage my colour scheme naturally composed of browns, orange, yellows and greens.

I started off the layering with a collage of newspaper, sheet music, old maps and brown paper. I built this up with the shapes of the objects in mind and catered for the the shadows by blocking in darker coloured papers, mainly from pictures in the news.

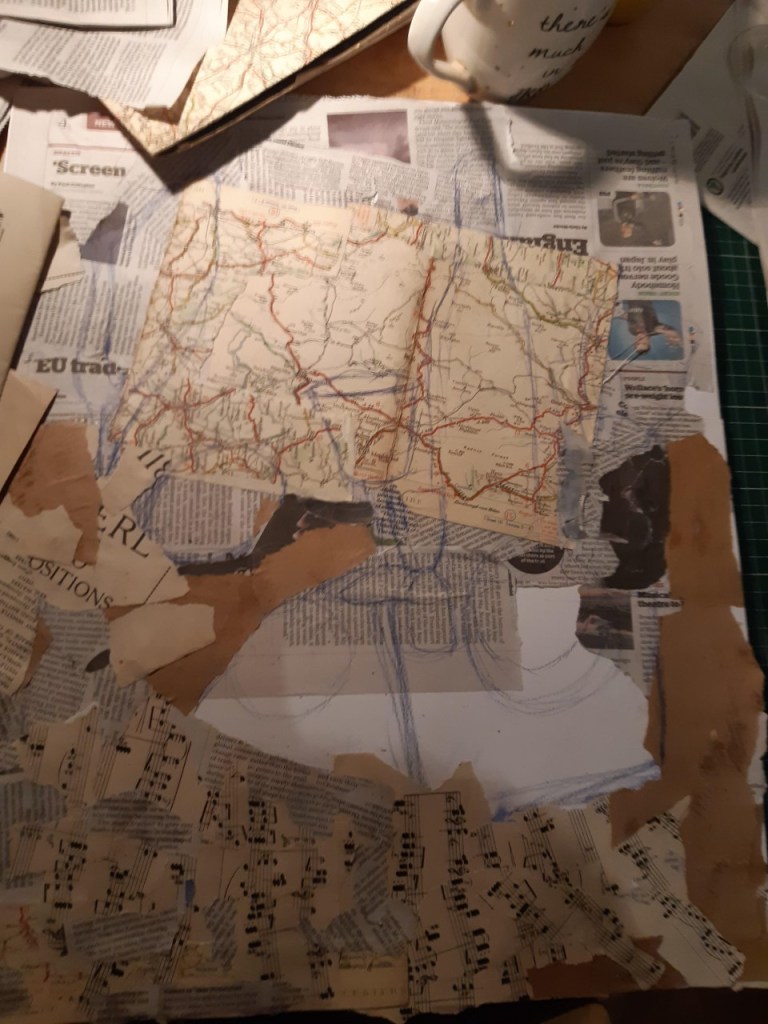

Base layer with mixed papers showing the forms of the objects
I wasn’t sure if this would be effective in creating an extra depth, but as I found out later it was worth the effort. Details such as the folded newspaper in the middle was actually depicted by a folded newspaper that was raised from the surface to add to the depth.

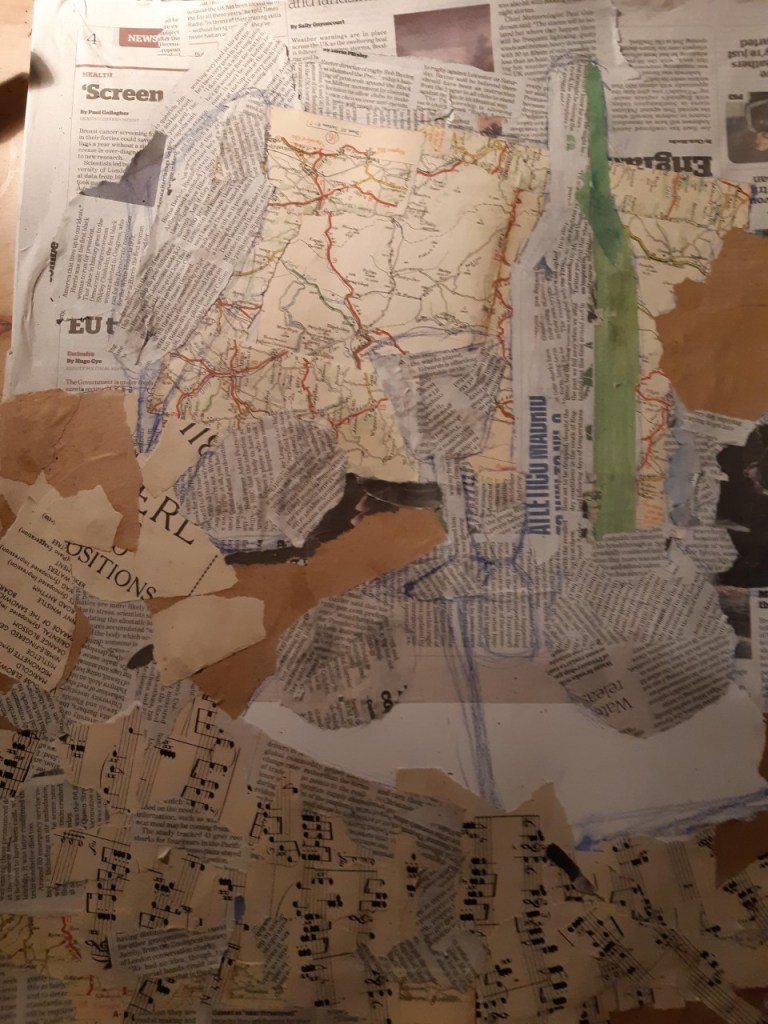
I then went on to add more details before I started to mask in the objects with the emulsion. This base layer of emulsion lifted the objects from the page and separated them from the background giving a varied relief effect to the picture. At this point I was careful not to complicate or pull the harmony of the drawing apart so I was mindful to keep a balance later using the colour scheme, and treating the objects with the same techniques to unify the final effect. This would be important as to not fragment the still life in its last stages.
Once the paint was dry I could start to layer the washes of ink before setting about the detail and tone.

Addition of emulsion 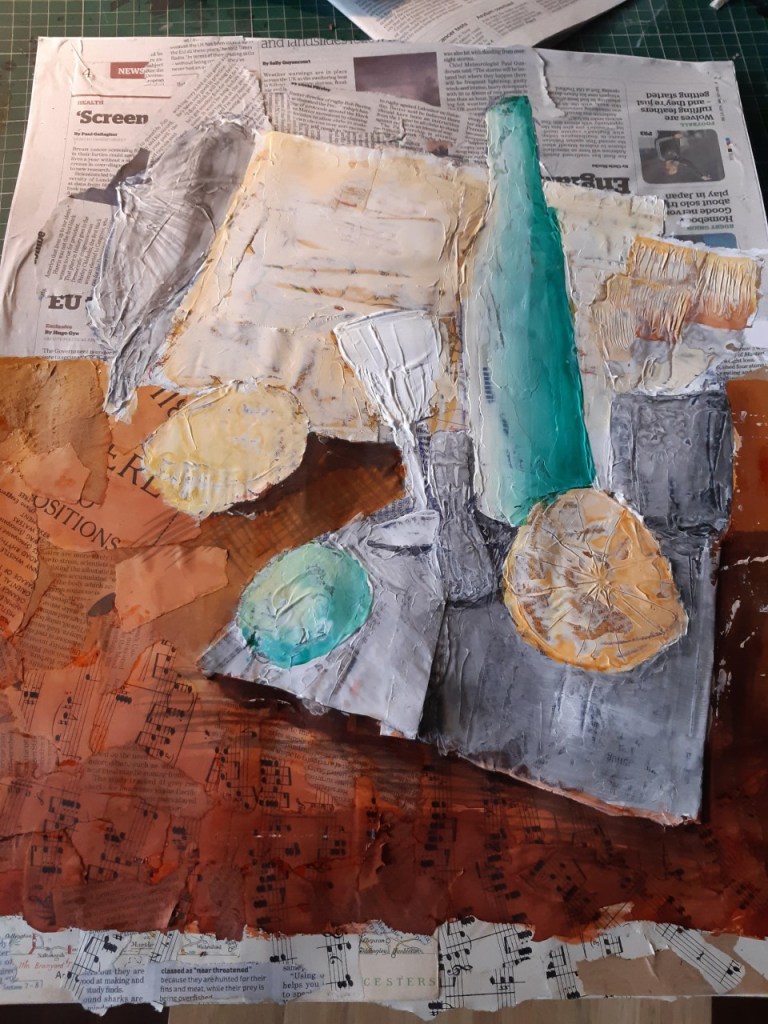
Washes of coloured ink
The final task was to add the details in and emphasise the tones using the coloured biros to give a dramatic contrast and 3 dimensional look and feel. The biro added a deep vibrancy to the objects that seemed to dance away from the background which turned out quite successful to my surprise and the colour scheme managed to maintain a decent harmony. By washing over the background newspaper in a light blue wash created a nice contrasting depth to the warm hues of the foreground and the grey tones of the actual depicted newspaper, and the grey flat cap balanced up the oranges and yellows while the green bottle on lime cut through the dominant yellow picture.

The vibrancy of the picture pleased me and the overall harmony was pulled together with the colour scheme and the similar treatment of materials with each object. I don’t think any one part of it stands out or looks odd.
Basing the composition around angles and simple shapes I used the slanting picture frame not only as a background, but to give the piece a dynamic feel which I tried to extend forward with the newspaper. The main features are on the right hand side so I used the flat cap to attempt to balance it out, but the main movement I was aiming for was from left to right, the forward and down towards the centre bottom following the path of the newspaper. When I chose the final composition I found sitting directly in front of it caused the hat and the picture to be too far away from the group, so I rotated my view around so that the hat appeared closer toward and behind the other objects, drawing the picture together and creating more depth. This was a subtle move that changed the dynamic of the composition without changing the actual arrangement.
Conclusion and review.
All in all I feel the picture was a success. As it was a first attempt mixing these media and the basic ideas worked really well together so I will note them down for further research. Things like layering the details and especially building up the base papers can be worked on through practice like any mixed media project, and I believe this technique will lend itself well to buildings, street scenes and even portraits. Keeping the colour schemes basic is key for the harmony of the piece and although the right hand side seemed a bit cluttered, I think it suited the style, almost like a controlled chaos……I could just imagine a phonograph in the background playing some scratchy jazz music!
