
Before starting this exercise I decided to look into folds in fabric, and was surprised to find that there are only 6 main types of fold, and that a lot fabric folds are just combinations of these depending on the point of contact with the object underneath, governed by slack and tension.
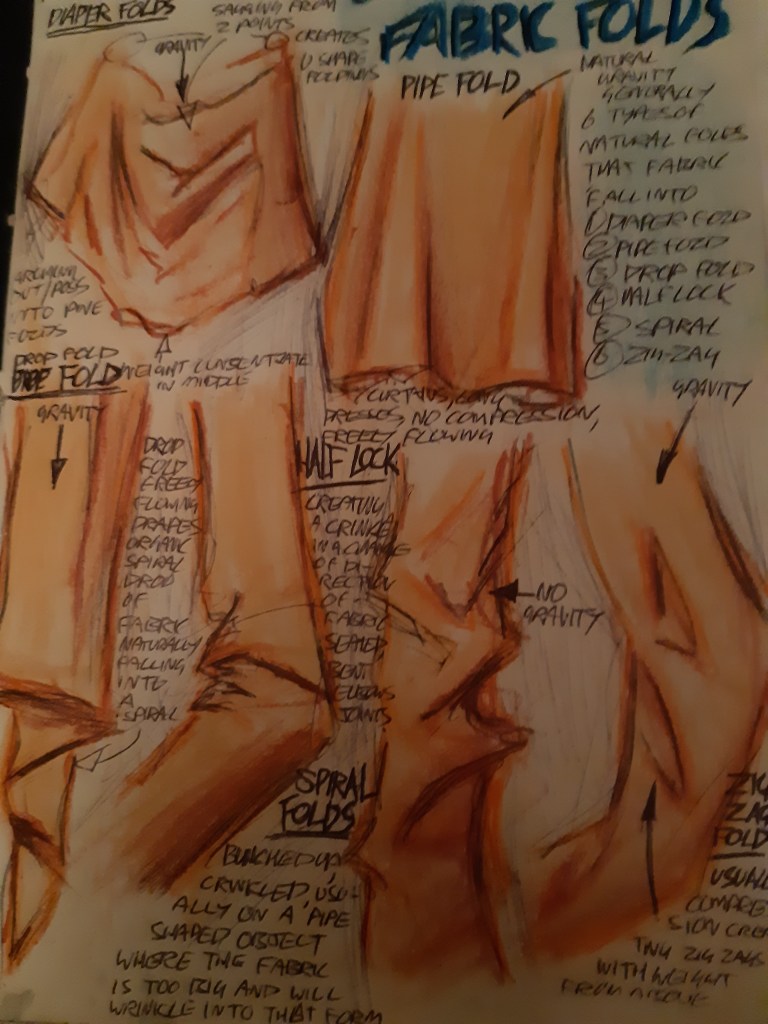
The six main fabric folds tend to fall into these caregories:
- The diaper fold, where the fabric is suspended between two points and hangs loosly in between to form an upside down arc because of the weight of the fold in the middle.
- The pipe fold, often seen in curtains when a fabric hangs loose and its weight wrinkles it up, flanging out towards the bottom.
- The drop fold, like a more intense pipe fold that has been compressed the bottom tends to fall into a spiral pattern.
- The half lock, is created when the fabric is covering a bend cylindrical shape underneath. It creates tension on the outer side, and wrinkles up on the opposite side.
- The spiral fold, is when the fabric hangs loose and baggy from a cylinder and buckles up into sharp creases that tend to alternate from left to right.
- The zig-zag fold, usually created with compression from above when the fabric is lying flat.
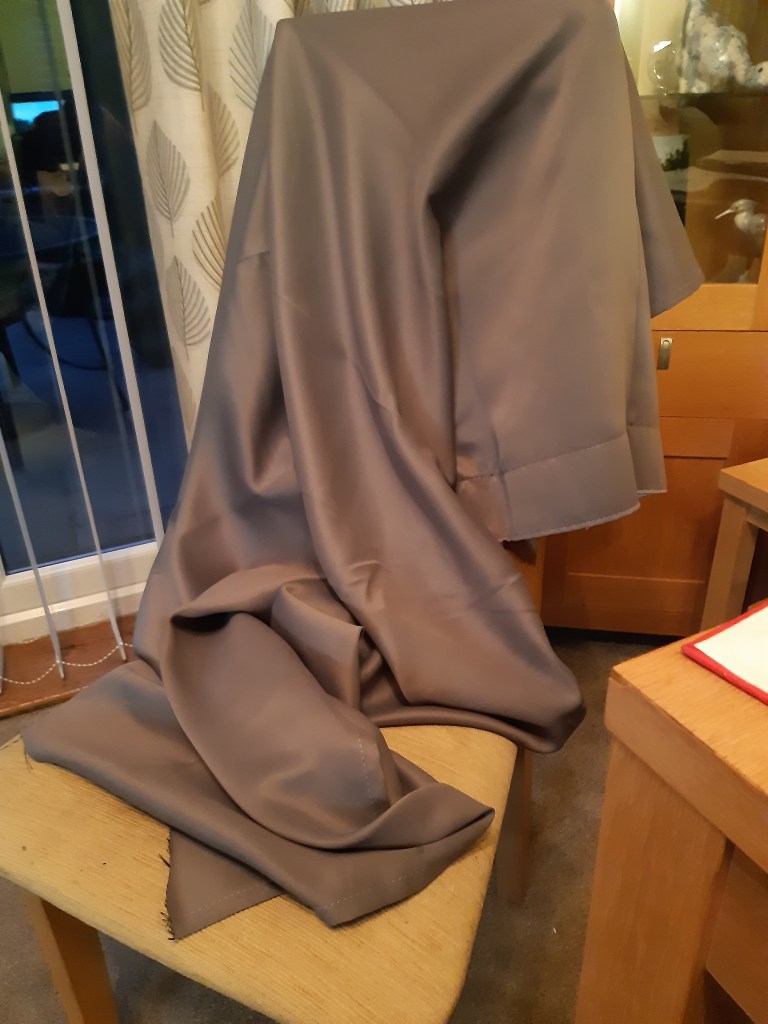
With these in mind I draped a smooth cut of fabric over a chair and bunched it up to get some interesting folds.
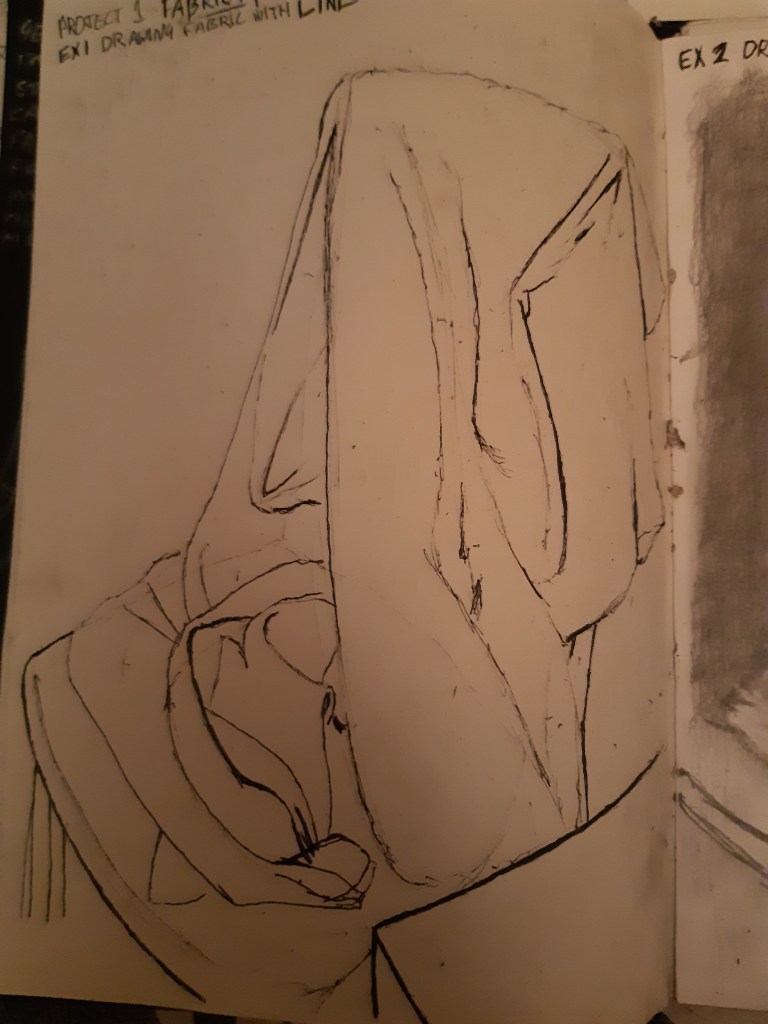
From here I did two 15 minuet sketches, one with just line, and one concentrating on form.

I trailed some different mediums such as biro, pencil, and fine liner to see which one rendered the line drawing better and went for the fine liner as it gave a more prominent, controlled line and I was pleased with the results. For the form sketch I went with graphite stick and eraser.
When I concentrated on the form, I used a graphite stick and an eraser to pull out the detail, working it back and forth with an old paint brush. I quickly masked in the shapes, brushed the whole picture to cover it grey, worked in the shadows, smoothed it out, then went to work with the eraser, building up the layers until the folds became convincing.

I enjoyed this so much that I did another one just to get the hang of it!

It was good to work in this was with the graphite, but the biggest thing I took away from this exercise was learning about the 6 primary folds. This broke the confusion down and I started to recognise them in all the fabrics and clothes I saw from then on. As I now understand where to find them and why they behave like that it makes it a lot easier to decipher when trying to draw them. Also an important technique I realised was to look for the overall shapes and block them in first even before acknowledging the finer details. This helped me get the flow of the fabric which in essence i guess is what it is all about.

This is great information to have! I really need to work on drawing fabric folds, so you’ve inspired me to start practicing in my sketchbook. Thank you so much.
LikeLike
I found that once you become familiar with the 6 main folds you start to see them everywhere. Really helped me understand and be able to draw convincing folds from imagination….happy drawing
LikeLiked by 1 person
Thank you. I’m only now starting to work a bit with still life painting, so what better time to practice fabric folds? I’ve drawn them in my sketchbook working from a tutorial by Barbara Bradley. I’ve never really painted fabric before though… just a couple of “practice paintings” with a couple still life objects. Thank you for all the good wishes.
LikeLike